How to create an OAuth client
Once you have a GoTo account, you can create an authentication client on the site. GoTo uses OAuth 2.0 for authentication.
The authentication client connects your developer account and the GoTo products you specify. It provides a client ID and a client secret you can use in the authentication process to request an OAuth access token.
Create a client (Details)
-
In the current portal, choose OAuth Clients from the menu. If you have not created a client yet, you see the intro graphic. Choose Create a client to continue.
-
If you already have clients, they are listed here. Scroll to the bottom of this listing and select Create a New Client.
-
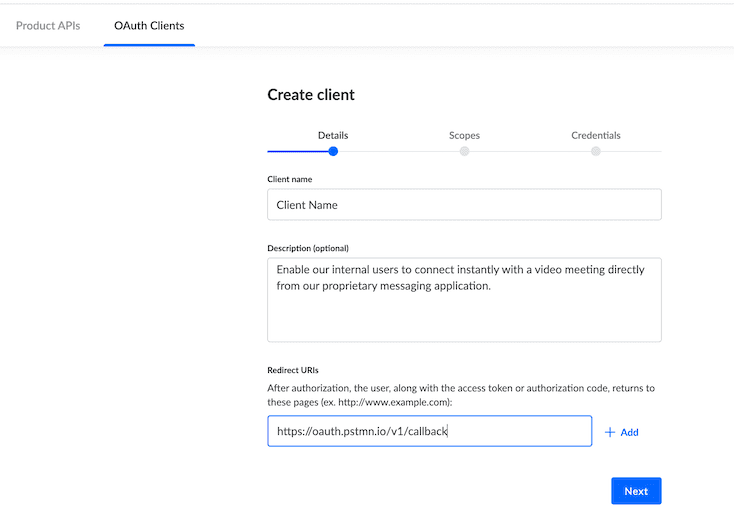
On the Details page, enter a Client name, an optional Description, and at least one Redirect URI. (Click Add to add additional redirect URIs.)
-
Click Next to continue.
Create a client (Scopes)
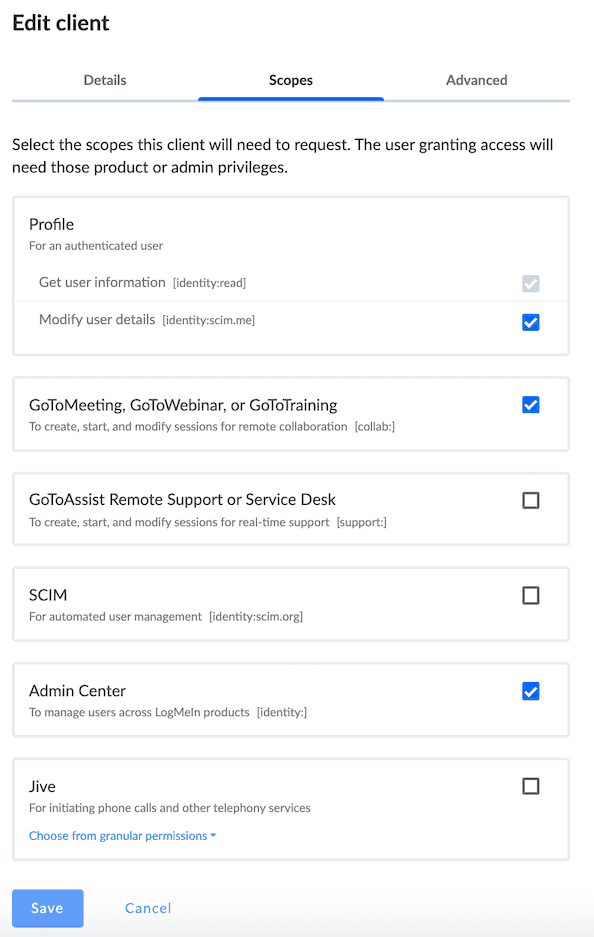
A scope is an authorization from the end user to let your integration to act on their behalf with a specified product. This is completely independent of the permissions that the user has in their GoTo account or products.
The user will be prompted to allow these scopes when they log into the product during API authentication.
- Select the products and functions you intend to include in your application(s).
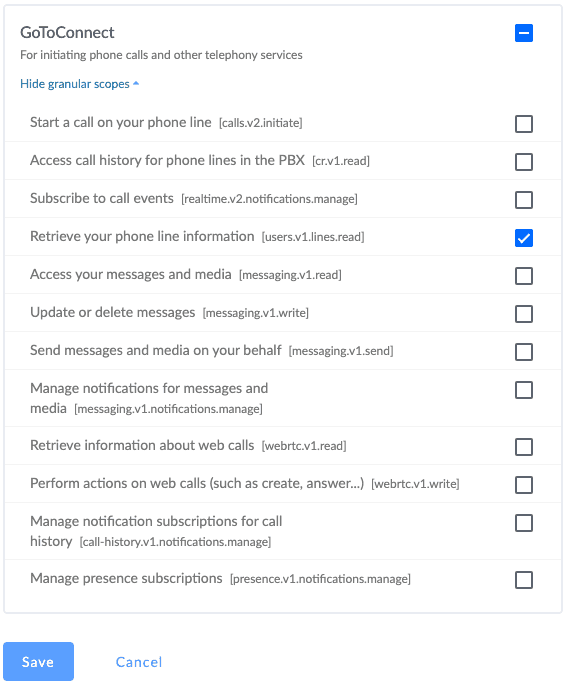
- For GoToConnect, you can select the product to include all scopes, or unselect the product and choose individual scopes as needed.
- Click Save.
The following image shows the GoToConnect scopes in detail.
Create a client (Credentials)
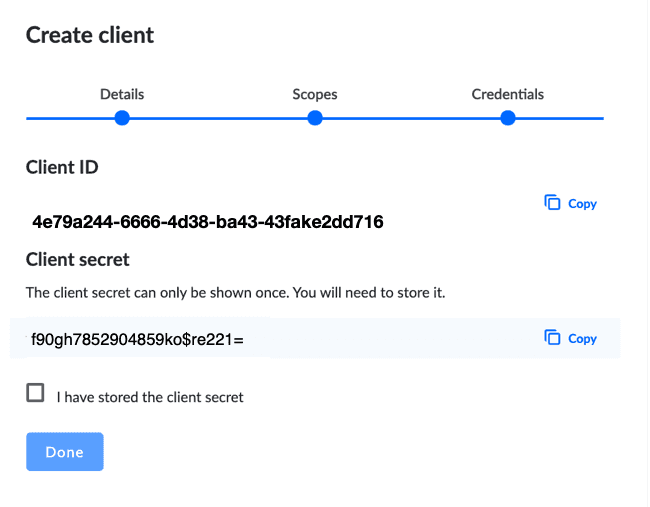
The client credentials are displayed. It is important to note that the client ID and client secret are required during authentication. The client secret is displayed here ONCE, only during client creation. Then it is hidden and irretrievable.
- Copy the client ID.
- Copy the client secret.
- Click the box 'I have stored the client secret.'
- Click Done.
If you are using Postman as your API development platform, you can store client data in your Postman environment, though this has security limitations.
Production Rate
Once you are ready to go live with your client, visit this section to get higher rate limiting.
- How do I get started?
- How to create a developer account
- How to create an OAuth client
- How to obtain an OAuth access token
- How to obtain an OAuth access token using a Personal Access Token
- How to obtain an OAuth access token (in Node.js)
- How to Obtain and Use Refresh Tokens
- Migrating to New Token Retrieval with authentication.logmeininc.com
- How to use GoToConnect API to fetch account users and lines
- How to create, update and delete account users via Admin API
- Call Events Screen Pop Tutorial
- Send SMS tutorial
- How to use Voice Admin APIs
- How to create a channel and receiving notifications from GoTo services
- How to subscribe to and get call events
- Fetching Call Events Reports
- Make and Receive Calls using the Devices and Calls API
- GoTo Connect APIs Host Migration
- GoToWebinar webhooks
- How to use GoToWebinar webhooks
- What API information is available for GoToMyPC?
- How to Setup an Integration with Central
- How to Setup an Integration with Rescue
- Rescue iOS and Andriod SDK
- Introduction
- Java SDK
- .NET SDK
- Direct login migration
- How to use Postman API collections
- How much do the GoTo APIs cost?
- How do I get support for the APIs?
- Rate Limiting


